
|
An overview of what glazes are and their characteristics will be very helpful if you are new to them. Glazes are very diverse. Not only are there a wide variety of colors, but also of opacity, surfaces, and temperature ranges.
Glazes are a type of glass that are especially made to stick onto pots and other ceramic surfaces. When molten, this specialized glass is stiffer than glass that is poured or blown is. This is important, as otherwise the glaze would run off the vertical surfaces of the pots when brought up to temperature in the kiln.
|
Underglaze

|

|

|

|
|
|
|
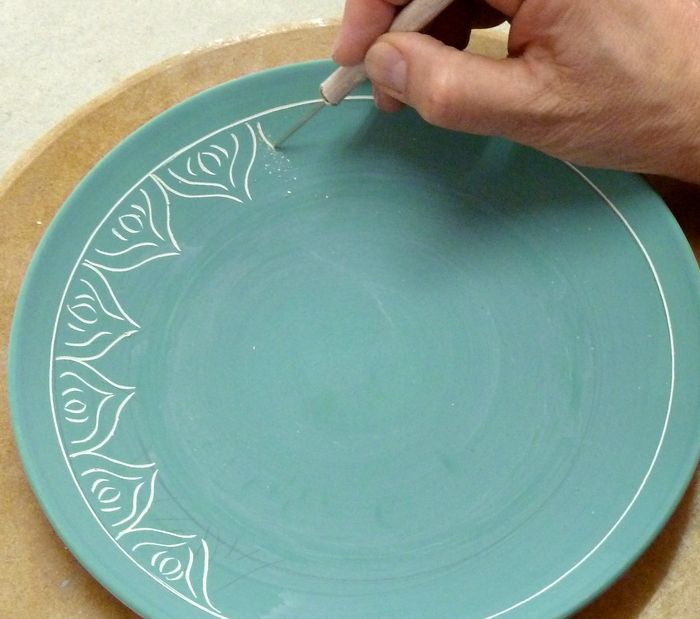
Underglazes tend to be highly pigmented for strong color. They are desired for painting by many ceramists because they stay where you put them. In other words, with underglaze the lines won't "flow" into each other like many glazes.
The original underglazes fire very dry, so they are most often covered with a clear glaze. The underglazes are applied to wet clay or greenware. This way the "clay based" colors can shrink with the piece they are on. Recently glaze manufacturers have begun to make underglazes which can be applied to bisque. They do this by adding a more frit than clay. Frit contains silica which is one of the main ingredients in glaze. The silica causes the underglaze to "melt", effectively making it a little more like a glaze. This change allows you to apply the underglaze to bisque (and sometimes to both greenware and bisque). When do you apply the clear glaze (if you are applying one over the top of the underglaze.)? If you are using underglaze on greenware, the most common method is to bisque the decorated greenware, then apply the clear glaze and fire again. One advantage of this is that you get a final chance to add more color if you have an area that did not get enough coverage. Sometimes this problem doesn't show up until after a firing. Another advantage is that you won't risk messing up your design when you apply the clear glaze. However, you can apply the clear glaze right over the top of the underglaze without a firing between. This is best done if you applied your There is also a risk that you can mess up the design by applying the clear. So a good approach is to sponge on the first coat of clear to help protect the underglaze. Then you can gently brush on your remaining coats. Often |
dipping the piece into clear glaze will not affect the underlying design either, but you should test as some underglazes do "dissolve" or "smudge" easier than others when a glaze is applied to it.
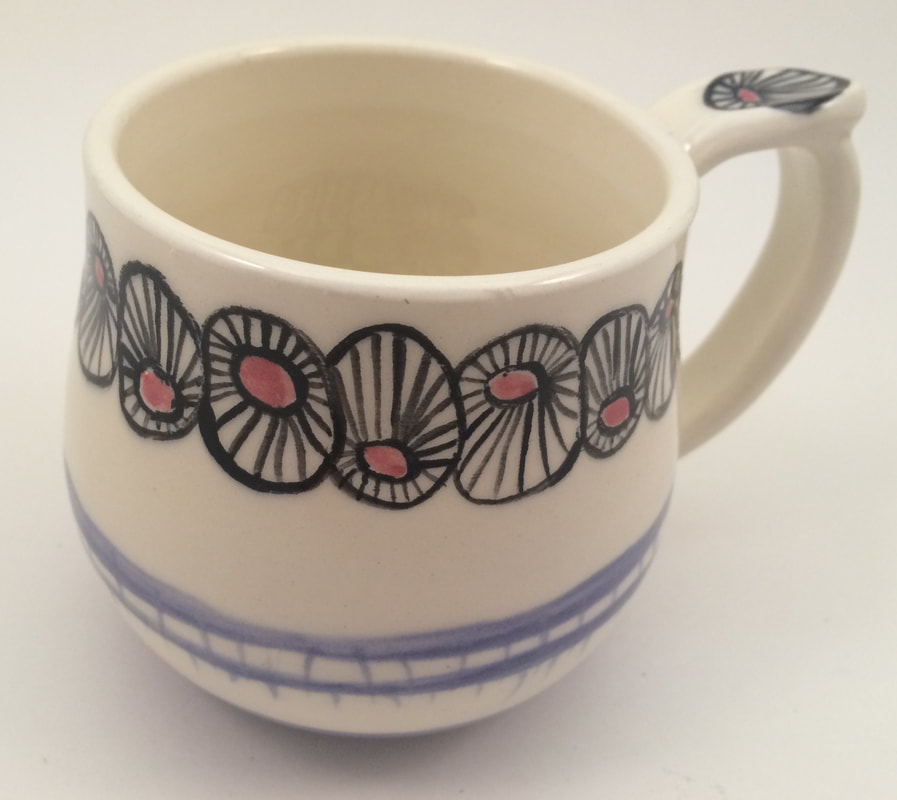
Unlike glazes, underglaze colors can always be mixed together to create new colors. Also unlike glazes, the color when fired is similar to the color when wet (another reason why painters often prefer underglazes.) You cannot put UNDERglaze over glaze. Hence the term "UNDER"glaze. 
|
Glaze

|

|

|

|

|

|
|
Glazes come in literally thousands of combinations of colors, textures, styles and types that can be applied in many different ways and fired at a range of temperatures. Glazes are sometimes the most exciting part of ceramics. This is partly because the transformation of the piece when it is fired can be quite pronounced. This is why it is often described as “the magic” in ceramics.
Most raw glazes do not look like what they will look like after they are fired. The heat of the kiln causes a chemical reaction in the glazes that alters their appearance. In glass they call this striking. If you have ever seen copper roofs turn green, the process is similar. The same glaze can also turn different colors when fired to different temperatures. Some glazes that can be fired to a wide range of temperatures will have one appearance at Cone 06 and a completely different look at cone 6. The description of a glaze surface properties falls into many names and categories with an infinite number of variables in-between. Here are the basic names you should learn to recognize. Transparent, Opaque, Gloss, Matte, Breaking, Flowing, and then there are the limitless color names added to these descriptive surface names. So a very descriptive name of a glaze could be Glossy Opaque Canary Yellow cone 05. The cone describing it’s firing range. Transparent is a description of whether you can see trough the glaze to the clay body underneath. All clear transparent glazes darken the color or the clay or underglaze they are placed upon. Colored transparent glazes will darken the clay body and will often darken and muddy the color of an underglaze that is placed underneath them. Opaque describes a glaze that cannot be seen through, thus covering the surface and color of the clay. Glossy refers to a glaze surface that is shiny and reflects light. Matte describes a surface that has no shine and absorbs light with no reflection. So now we come to all the variables and combination names. Semi Transparent is a glaze that has partial transparency just as Semi opaque means it will not completely block out what is beneath it. Semi- Gloss means the glaze is somewhat shiny but not total reflective just as semi matte refers to the surface being somewhat dull but has a bit of shine. Then there are similar names such as Satin Matte. The example Glossy Opaque Canary Yellow would describe a bright yellow shiny glaze that you cannot see through that a is recommended to be fired to cones 05. Here are some further descriptions on how glazes react and move when fired. A Breaking glaze is a reference to a glaze that will change color and sometimes transparency as it thins or thickens on a raised or recessed area during the firing. |
A Flowing glazes means that it moves when fired and will bleed ( move ) into a glaze place next to it. A Stiff glaze stays put and does not move much from where it is applied when fired.Read the glaze label. It will tell give you information on the glazes concerning recommended firing temperature and application, and whether the glaze is non-toxic or cautions about its contents. Remember the non toxic and caution information refers to the contents of the glaze jar in it’s present liquid or dry form and is not an indication if the glaze is dinner ware safe. That should be listed separately on the jar. Every manufacture of glazes creates their own codes and descriptions of their glazes that can mirror the names we have discussed or be different to set them apart from other manufacturers. Glazes can be categorized by their firing temperature, surface qualities, names and numbers. Don’t forget many will also have upc Bar codes and production dates so they can be tracked in sales and re-ordering. You should always run a test on glazes you have not used previously. 
|
TerminologyThe terminology used in explaining the process of glazing can be very confusing at first. Please find below a quick summary of common used phrases.
Underglazes: A glaze that is used for consistent colors that stay in the same exact place they were added. Low Fire Glaze: Fired from cone 012- 02 (1623⁰F-2048⁰F) Mid-range Fire Glaze: Fired from cone 4- 7 (2167⁰F- 2264⁰F) Overglazes: Accent products that are applied after pottery has already been glazed once and fired. Slips: Watered down clay that normally has a specific color added to it. Sometimes it is made into a very thick liquid that is used to draw or color on clay. Gloss: Smooth and shiny, with a highly reflective surface. Matte: The exact opposite of gloss. Matte produces very little shine on pottery pieces. Dead Matte: Produces no shine what so ever. Opacity: This term refers to the transparency of the glaze. Antiquing: Applying a certain color and wiping it back to accentuate the surface of the pottery piece. Cadmium: A heavy metal that is used to produce red glazes and underglazes as well. Coats: Applications of color or glaze by brush or sponge. Crawling: Glaze that pulls together tightly and beads up until it leaves small bare spots of bisque. Dryfooting: This is when glaze is removed from the very bottom of a clay project so that way it can be fired without stilting. Finger-sand: Rubbing a glazed surface softly to remove any ridges on the pottery piece. Flowing Coats: Using a brush soaked with glaze for application so the colors will slowly flow onto the surface of the pottery. Pin Holes: Little holes in the surface of a finished glaze or underglaze. Lead Release: The lead that is dissolved from the glazed surface that came into contact with acid solutions. Kiln Wash: This is a coating that is applied to the very top of the kiln shelves to help protect them from the glaze drippings. |
Five Basic Components of Glaze
Pottery glaze is made up of five basic components. These components are silica, alumina, flux, colorants and modifiers. Even though all glazes are made up of the same components, there is a vast range of colors and types to choose from. The common ingredients that are in glaze colors are copper oxide, copper carbonate, cobalt oxide and iron oxide. When using glaze for your pottery products, it is always important to be aware of what exactly it is that you are working with. Below is a list of the five components that pottery glazes are made up with and what role they play.
Silica - When silica sand is heated in the kiln past 3100 degrees F it melts and forms into glass. Along with silica sand, flint is also added in this component for a proper finish. Alumina - Alumina is used to help the glaze stick to the clay properly and keep it from running of the piece when heated up to high temperatures. Flux - This component in particular is what helps melt the glass component called flint. The types of flux you can choose from are bone ash, iron, zinc, sodium and many more. Colorants - Colorants are a whitening agent such as iron oxide, chromium oxide and talc. Modifiers - Modifiers are used to change the glaze surface affects like the opacity and transparency. Below are the different types of modifiers Opalescence - Reflects iridescent light on the glazed finish Bentonite - Helps hold components into suspension during the firing process Opacifiers - Gives glaze a white or opaque background. Types of opacifiers used are bone ash and tin oxide Suspenders - Used to keep heavy components from setting out after the firing process Gums - Used to toughen the glaze and help protect the finish before being fired at extremely high temperatures |
DryfootingDryfooting is a very important step that MUST not be skipped. If you do not dryfoot your pottery piece properly, you risk the chance of your glaze running onto the kiln shelf. If this happens, your pottery piece will stick to the shelf and removing it is not pretty. This usually involves a hammer and chisel, meaning it will not come off in one piece.
|
|
